LabVIEW operation with RogaDAQ4
RogaDAQ4 is a highly accurate portable data acquisition system.
Four simultaneously sampled 24-bit resolution channels accurately measure any signal with frequencies up to 80 kHz.

- RogaDAQ4 Datasheet
- Price: 2198 €
Frequency range | DC ~ 80 kHz |
|---|---|
Input voltage range | ±10 V / ±1 V selectable |
Input coupling | DC/AC/IEPE selectable |
Sensor supply | 4 mA @ 24 V |
Input impedance | 1MΩ, 20pF |
Overvoltage protection | ±40 V |
Anti-aliasing filter | 800 dB/octave |
Dynamic range | > 123 dB |
Amplitude accuracy | 0.10% |
Resolution | 24 bits |
Input voltage range | ±30 V |
Size | 80 x 118 x 64 mm |
Weight | 400 g |
Operating temperature range | 0 to 55 °C |
Driver Installation
To use the RogaDAQ4, install the driver.
- Download the driver “RogaDAQ4-USB-Port-Setup.zip” by clicking “1 Setup RogaDAQ4 USB Port Driver” on the website.
- Unzip the “RogaDAQ4-USB-Port-Setup.zip”.
- Run “RogaDAQ4 USB Port Setup.exe” to install.
- Press the NEXT button and the Install button to move through the screens to execute the installation.

Connecting the RogaDAQ4
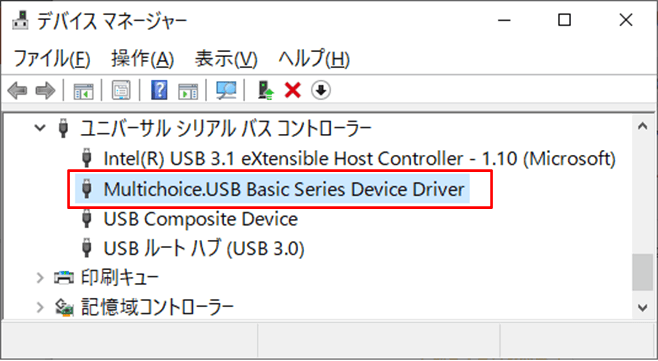
After installing the USB port driver, connect the RogaDAQ4 to your PC and the device manager will recognize it as
“Multicoice.USB Basic series Device Driver”.
2. LabVIEW Driver Installation
Download the driver:
- Click “LabView Driver” on the website to download the driver “Setup_MAIv2_RogaDAQ4-LabVIEW.zip”.
- Unzip the “Setup_MAIv2_RogaDAQ4-LabVIEW.zip”.
- Execute “Setup_MAIv2_RogaDAQ4-LabVIEW.exe” to install.
- Press the NEXT buttons to transition through the screens to execute the installation.
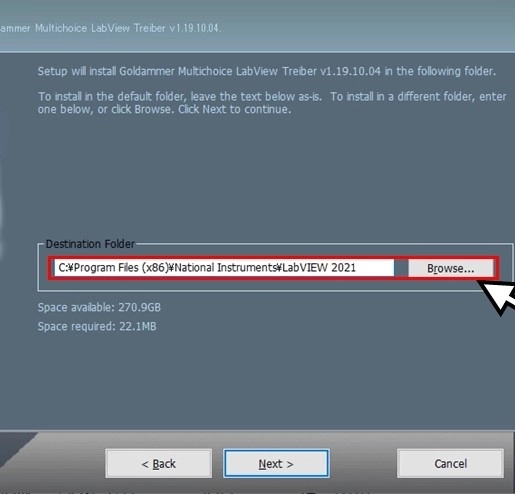
*The LabVIEW environment installed by default is installed in the latest version of LabVIEW installed on the PC.
Example: If LabVIEW2019 and LabVIEW2022 are installed, it will be installed in LabVIEW2022.
To change the LabVIEW version to be installed, change the folder to match the LabVIEW version in “Destination Folder,” which sets the installation destination folder.
LabVIEW Driver VI Compilation
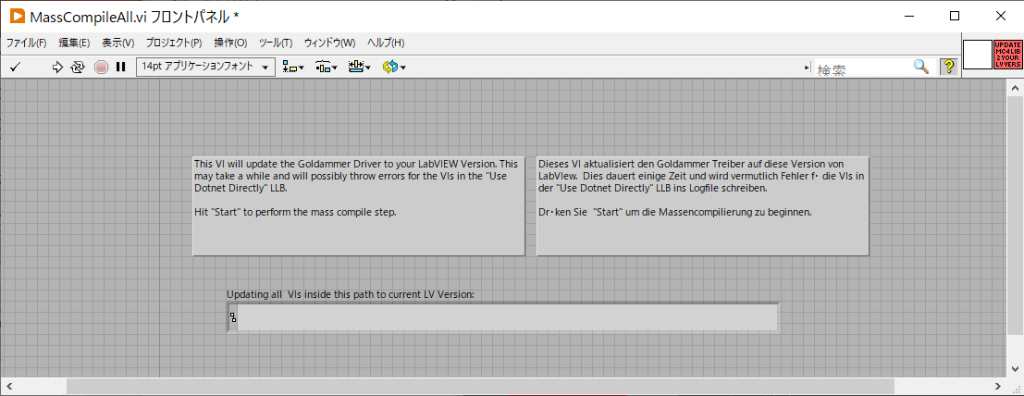
After the LabVIEW driver VI installation is completed, LabVIEW starts and “MassCompileAll.vi” is opened.
Execute MassCompileAll.vi to perform batch compilation.
The same operation is performed when batch compilation is performed by selecting
“C:\Program Files (x86)\National Instruments\LabVIEW 2022\user.lib\Goldammer” in the menu [Tools]→[Advanced]→[Batch Compile] from the LabVIEW screen.
The same operation is performed as when batch compilation is performed.
Running in LabVIEW
After the LabVIEW driver VI is installed, “Goldammer” will appear in the user library in the LabVIEW function palette.
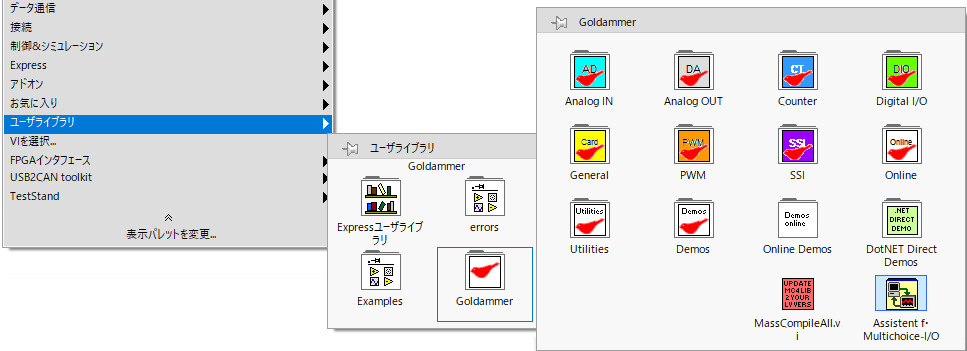
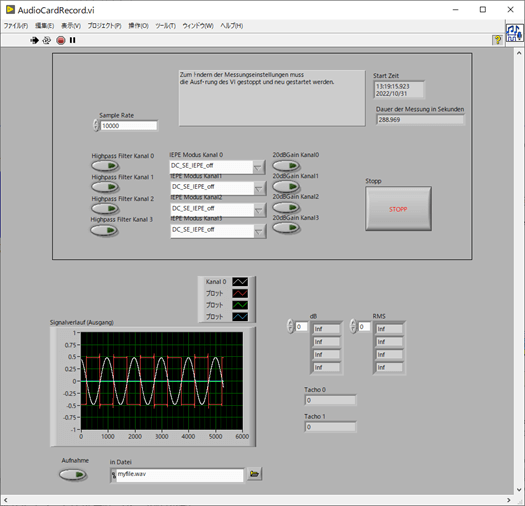
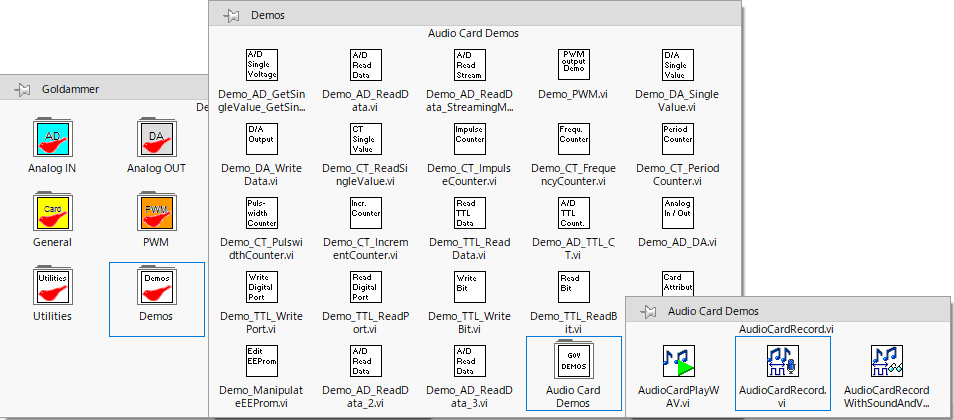
The RogaDAQ4 sample vi is [AudioCardRecord.vi].
[Goldammer]->[Demos]->[Audio Card Demos]->[AudioCardRecord.vi].
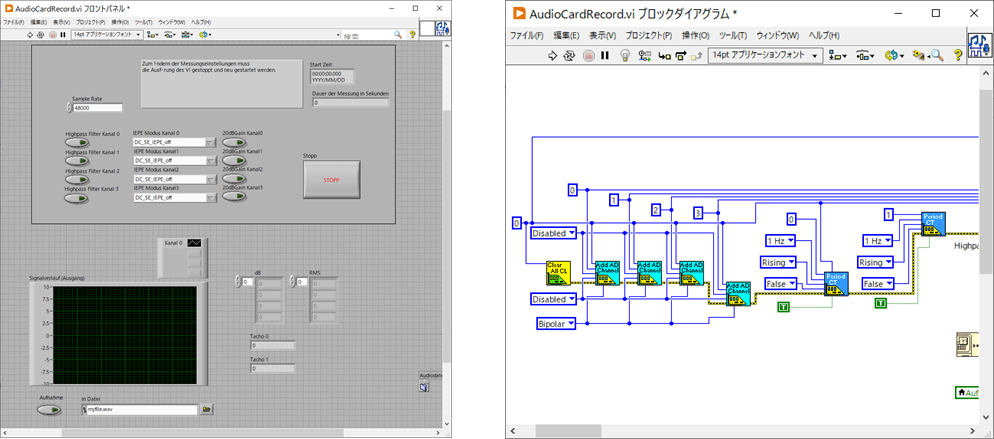
AudioCardRecord.vi Execution
- Connect a signal generator to the RogaDAQ4 connected to the PC via USB.
- Output sine and square waves of 1 V amplitude and 1 kHz frequency from the signal generator.
- Run [AudioCardRecord.vi].
- The LabVIEW screen now shows ch0: sine wave and ch1: square wave.